Page 1
Page 2
MAIN INDEPENDENT CONTROLS given in this manual. If you have any questions about your vehicle, contact your Reprint: September 2006/A Local aprilia Dealer, as he will have the very latest technical information available from the factory. For tests and repairs not expressly.
Page 3
accidentally get gasoline get your eyes, flush SAFETY WARNINGS GENERAL SAFETY RULE with large quantities of cool, clear water and The following precautionary warnings are CARBON MONOXIDE immediately seek professional medical used throughout this manual in order to assistance. If it is necessary to run the engine in order to convey the following messages: carry out maintenance operation, make sure WARNING.
Page 4
BRAKE FLUID The coolant (ethylene glycol) can cause BATTERY HYDROGEN GAS AND skin irritation and is poisonous if ELECTROLYTE swallowed. WARNING WARNING Coolant and coolant/water mixtures are Brake fluid is extremely poisonous. Do sweet to the taste and brightly colored, The battery gives off noxious and not ever allow brake fluid to be ingested therefore are highly attractive to pets.
Page 5
USA Inc. your dealer, or aprilia. To contact NHTSA, b) The use of the vehicle after such device or 140 E 45 Street, 17C.
Page 6
CAUTION (V.I.N.) (FRAME NUMBER) VEHICLE IDENTIFICATION NUMBER This product should be checked for Every vehicle produced by aprilia receives Description of the vehicle identification repair or replacement if the vehicle a vehicle identification number (V.I.N.) number (V.I.N.), stamped on the steering.
Page 7
635 lbs. 130/60 – 13 53J tires E-13 x 3.50 – DOT-D rim, at 26.1 psi COLD 130/60 – 13 53J tires 448 lb E-13 x 3.50 – DOT-D rim, at 31.9 psi COLD -VFC- MOTORCYCLE DIGIT MEANING ZD4RY***#4#000000 1) Manufacturer#x2019;s identification alphanumeric code.
Page 8: Table Of Contents
POSITION OF THE WARNING ADHESIVE LABELS use and maintenance SR 50.
Page 9
TO REMOVE THE PANEL SEE OWNER’S MANUAL Never install accessories or replacement parts not approved by Aprilia as original equipment. This can degrade the handling and safety of your motorcycle, and can cause an upset with subsequent accident and serious injury or even death. The stability and safety of any motorcycle is adversely affected by the addition of any load carrying accessory.
Page 10
OIL: TWO STROKE OIL VISCOSITY SAE 40W (SYNTETIC) OR injury or death, you should immediately inform the National Highway Traffic Safety 30W (SEMISYNTHETIC). Aprilia S.p.A. Administration (NHTSA) in addition to notifying aprilia World Service USA, Inc.
Via G.Galilei 1 aprilia 30033 Noale (VE) ITALY If NHTSA receives similar complaints, it may open an investigation, and if it finds that a safety defect exists in a group of vehicles, it may order a recall and remedy campaign.
Page 11
3 0. 0 0 0 k i l o m e t e r s ( 1 8. 6 4 1 m i l e s ). aprilia will repair your motorcycle at no cost should contact aprilia USA, Inc. 10933 whichever first occurs.
Page 12
C a l i f o r n i a CONTROL SYSTEM I. COVERAGE. Warranty defects shall be Administrative Code, may be performed aprilia s.p.a. Via G. Galilei, 1, 30033 remedied during customary business by other than an authorized aprilia Noale (VE) Italy (hereinafter #x201C;aprilia#x201D;) h o u r s a t a n y a u t h o r i z e d a p r i l i a dealer.
Page 13
However, C. Any motorcycle on which the odometer IMPLIED BY LAW, INCLUDING ANY aprilia is not liable for these parts. The mileage has been changed so that WARRANTY OF MERCHANTABILITY o w n e r i s r e s p o n s i b l e f o r t h e.
Page 14
Holland South Africa 69 (REMOVING THE RIGHT AND LEFT and are to be supplied to the Local aprilia Switzerland New Zealand INSPECTION COVERS). Dealer as reference data for the purchase.
Page 15
PROLONGED PERIODS OF INACTIVITY. 77 SYSTEM WARRANTY COVERAGE. 11 OWNER#x2019;S WARRANTY RESPONSIBILITIES. 11 INSTRUCTIONS FOR USE. 48 TECHNICAL DATA.
78 APRILIA S.P.A. – LIMITED WARRANTY ON PRE-RIDE CHECKS CHART. 48 LUBRICANT CHART. 81 EMISSION CONTROL SYSTEM. 12 STARTING. 49 WIRING DIAGRAM – SR 50 DITECH.
Page 16
WIRING DIAGRAM KEY – SR 50 PUREJET. 85 CABLE COLOUR. 85 SCOOTER WIRING DIAGRAM – SR 50. 86 SCOOTER WIRING DIAGRAM KEY – SR 50. 87 CABLE COLOUR. 87 AUTHORIZED DEALERS AND SERVICE CENTERS. 88 use and maintenance SR 50.
Page 18
BASIC SAFETY RULES The instructions given below cover normal operation of your vehicle and must be carefully observed. By following these rules you will enhance your own safety and the safety of those around you. You will also maximize the life and utility of your vehicle.
Page 19
Observe all rules of the road. Particularly Avoid obstacles that could damage the Always ride with both hands on the pay attention to all warning, regulatory and vehicle or make you lose control. handlebars and feet on the footrests. informational signs. Do not tailgate, do not attempt to increase Never shift gear without using the clutch, if Avoid showing off (i.e. popping wheelies).
Page 20
Use only the vehicle#x2019;s specific fuels and is released. Contact your Local aprilia lubricants indicated in the #x201C;LUBRICANT Your aprilia dealer is ready and able to Dealer for repairs. Failure to heed this CHART#x201D;; check the oil, fuel and coolant.
Page 21
This vehicle was not designed to be angle or color of your license plate. Do not original parts, and use only original aprilia equipped with a sidecar or to be used to cover it with even a clear plastic covering.
Page 22
Never race other vehicles with your Always ride at the appropriate speed and Gradually open and close the throttle, to vehicle. avoid unnecessary hard acceleration. This avoid spinning or skidding the rear wheel. not only is safer, but also reduces fuel Brake with both the front and rear brakes.
Page 23
Always observe posted and statutory Inevitably, the driver will look right at you, CLOTHING speed limits, but do not assume that you and yet swear that they did not see you Before riding your vehicle, ensure that your can ride as fast as the speed limit under all before they turned directly into your path.
Page 24
T h e i n s t a l l a t i o n o f i n a p p r o p r i a t e emergency.
Page 25
Do not hang anything from your vehicle This makes it more likely that the front Never carry loosely packaged items, make handlebars, fenders, or forks, because this wh e el w il l c o m e u p o f f t h e g r o un d. sure that everything that you carry on your will upset the handling of your vehicle, and especially on acceleration.
Page 26
ARRANGEMENT OF THE MAIN ELEMENTS C 364 1) Coolant tank 5) Mixer oil reservoir 10) Air filter 2) Coolant expansion tank plug 6) Seat lock 11) Center stand 3) Rear brake fluid reservoir 7) Battery compartment / tool kit cover 12) Left passenger footpeg 4) Mixer oil reservoir cap 8) Fuel tank.
Page 27
C 364 1) Helmet compartment / glove 5) Warning horn 9) Right passenger footpeg compartment 6) Battery 10) Antitheft hook (for the aprilia Body- 2) Ignition switch/steering lock 7) Fuse carrier Guard shielded cable 3) Bag hook 8) Spark plug.
Page 28
LOCATION OF INSTRUMENTS/CONTROLS C 364 1) Rear brake lever 5) Right rear-view mirror 9) Ignition switch/steering lock ( – – ) 2) Electrical controls on the left side of the 6) Front brake lever handlebar 7) Throttle grip 3) Left rear-view mirror 8) Electrical controls on the right side of 4) Instruments and indicators the handlebar.
Page 29
INSTRUMENTS AND INDICATORS Combined brake lever (front and rear) C 364 1) Rev counter 1) Speedometer #xF067; #xF067; 2) Fuel level indicator ( 2) Fuel level indicator ( #xF068; #xF063; 3) Coolant temperature indicator ( 3) Green turn indicator warning light ( #xF061;.
Page 30
Setting the clock C 364 C 364 NOTE For safety reasons, it is possible to set this function when vehicle is stopped only. Hold down the Mode button (2) for at least three seconds. The column dividing hours and minutes will start flashing.
Page 31
Hold down MODE joystick (2) for a certain time to stop the measurements. It is possible to store up to 16 times in a r o w. t h a t c a n b e d i s p l a y e d o n t h e CHRONOMETER screen under the Menu function (see Menu Function).
Page 32
N O T E #x2013; Delete: enter this menu to delete the times T h e s a f e t y c o d e w i l l b e recorded using the Chronometer function. necessary to start the vehicle with a key All values can be deleted by holding down not fitted with a transponder or in any case the MODE joystick (2) for a certain time.
Page 33
INSTRUMENTS AND INDICATORS TABLE NOTE Turn the key to ON ( ), for the first three seconds all pilot lights, the instrument panel backlighting and the digital display indicators will come on, thus carrying out the starting check routine. Description Function Direction indicator warning light Blinks when the right or left direction indicator is on.
Page 34
Authorized Dealer. – If the light flashes, DO NOT start the engine and contact an aprilia Authorized Dealer. – If the light stays on, the vehicle is faulty, contact an aprilia Authorized Dealer.
Page 35
MAIN INDEPENDENT CONTROLS right. Press the switch to cancel the signal. 4) LIGHT DIMMER SWITCH ( If the dimmer switch is in position #x201C; #x201D;, the high beam comes on; while if it is in position #x201C; #x201D;, the low beam comes on.
Page 36
Position Function Key removal Steering lock The steering It is possible is locked. to remove the key. n o t p o s s i b l e t o s t a r t t h e e n g i n e switch on the lights.
Page 37
AUXILIARY EQUIPMENT HELMET COMPARTMENT / GLOVE UNLOCKING/LOCKING THE SEAT COMPARTMENT To unlock and lift the seat: Thanks to the helmet/glove compartment, #x25C6; Place the vehicle on the stand, see page you need not carry the helmet or other 55 (PLACING THE VEHICLE ON THE encumbering objects with you every time STAND).
Page 38
, a s t h i s m a y is advisable to secure it with the aprilia To reach this compartment, proceed as.
Page 39
CAUTION Indirect sunlight from behind reflecting on the windscreen might damage the instrument panel. It is recommended to park the vehicle with the sun shining in front of it. ACCESSORIES The following accessories are available: #x2013; large windscreen (1); #x2013; luggage rack (2); #x2013;.
Page 40
MAIN COMPONENTS FUEL WARNING The fuel used in internal combustion engines is highly flammable and can become explosive under particular conditions. It is important to refuel and service the vehicle in a well-ventilated area, with the engine off. Do not smoke while refuelling or near fuel vapors, in any case avoid contact with naked flames, sparks and any other heat source or source of ignition.
Page 41
7500 mi (12000 km) or every 2 years. (LUBRICANT CHART). handling engine oil. Have inspection and replacement carried Wear latex gloves during servicing. out by an aprilia Authorized Dealer. The vehicle features a control unit that IE 50 KEEP AWAY FROM CHILDREN. manages an electronic pump ensuring correct oil quantity for engine lubrication;.
Page 42
, m a k e s u r e t h a t i t i s doubt about the proper operation of the an aprilia Authorized Dealer that will perfectly clean.
Page 43
MIN mark. must be cleaned with a high-quality degreaser. CAUTION Have brake fluid changed at an aprilia The brake reservoirs are positioned on the Brake fluid level decreases as the brake Authorized Dealerevery two years. handlebar, near the brake lever couplings.
Page 44
Do not ride when coolant is below the minimum level MIN. Check the coolant level every 2000 km (1250 mi) and after long trips; have the coolant changed by an aprilia Authorized Dealer every 2 years. WARNING Coolant is toxic when ingested.
Contact with eyes or skin may cause irritation.
Page 45
(REMOVING THE FRONT COVER). that there is coolant. #x25C6; for leaks. Contact an aprilia Authorized Make sure that the level of the fluid Dealer for the repair operation. contained in the expansion tank (2) is CAUTION included between the MIN.
Page 46
Authorized Dealer t h e m a n u f a c t u r e r. s e e p a g e Overinflated tires will not absorb bumps or a tire specialist.
Page 47
. 0.12 in (3 mm) high rpm, even if only for a few seconds, but an aprilia Authorized Dealer immediately. However, the minimum tread depth must rather frequently. not be less than prescribed by regulations.
Page 48
For the tightening torques of nuts and Mixer oil Check and/or top up, if necessary. bolts that are not indicated in this manual, please contact an aprilia Wheels / tires Check tire surface, inflation pressure. Check for wear or Authorized Dealer. The tightening of a damage.
Page 49
NOTE #x25C6; Turn the key (3) and set the ignition Do not hold down the starter STARTING switch to position . button (4) for more than five seconds or the battery could run flat. If the engine does WARNING NOTE Do not leave the ignition to .
Page 50
STARTING If the engine fails to start C 364 WITH FLOODED ENGINE Wait a few seconds and repeat the COLD If the starting is not carried out properly or if START PROCEDURE. there is too much fuel in the intake ducts, #x25C6;.
Page 51
STARTING OFF AND RIDING While riding, keep your hands on the WARNING NOTE Before starting off, read the h a n d l e b a r a n d y o u r f e e t o n t h e With the vehicle stopped, try to become section Safe Riding, see page 5 (SAFE footpegs.
Page 52
When approaching a turn, slow down WARNING a n d b r a k e a n d t a k e t h e t u r n a t If the road surface is wet or slippery moderate, constant speed or accelerate (snow, ice, mud, etc.), ride slowly, do slightly;.
Page 53
WARNING If the general alarm light ( ) and the mixer oil reserve icon come on during normal engine operation, it means that mixer oil reserve is being used; in this case, top up mixer oil, see page 41 (MIXER OIL). CAUTION If the general alarm light ( ) and the.
Page 54
STOPPING PARKING CAUTION W i t h t h e e n g i n e s t o p p e d a n d t h e WARNING WARNING ignition switch in position #x201C; #x201D;, the Park the vehicle on firm and level battery may run flat.
Page 55
#x25C6; Lean the vehicle to the side until the If possible, use the appropriate aprilia stand is resting on the ground. Body-Guard shielded cable. or an #x25C6;.
Page 56
Keep away from the red-hot parts of the If you need assistance or technical advice, engine and of the exhaust system to avoid contact your aprilia Authorized Dealer for burns. guaranteed accurate, prompt service. Do not put any vehicle parts into your.
Page 57
SCHEDULED MAINTENANCE CHART OPERATIONS TO BE CARRIED OUT BY THE aprilia Authorized Dealer (USER MAY PERFORM THESE AS WELL). Component After running-in Every 2500 mi (4000 km) Every 5000 mi (8000 km) [312 mi (500 km)] or 12 months or 24 months.
Page 58
OPERATIONS TO BE CARRIED OUT BY THE aprilia Authorized Dealer Component After running-in Every 2500 mi (4000 km) Every 5000 mi (8000 km) [312 mi (500 km)] or 12 months or 24 months Rear shock absorber Bowden cables and controls.
Page 59
IDENTIFICATION DATA ENGINE NUMBER FRAME NUMBER It is a good rule to note the frame and The engine number is stamped near the The frame number (2) is stamped on the engine numbers in the space provided in lower support of the rear shock absorber. central tube of the frame.
Page 60
#x25C6; #x25C6; FRONT WHEEL Hold the wheel shaft (1) with an Support the front wheel and manually hexagonal wrench. slide out the wheel shaft. DISASSEMBLY #x25C6; #x25C6; Loosen and remove the nut (2), collect Remove the wheel carefully while sliding Read page 56 (MAINTENANCE).
Page 61
The fork legs will settle correctly. by an aprilia Authorized Dealerto avoid #x25C6; Working from the right side of the vehicle #x25C6; Tighten the two screws (3) on wheel any failure that might seriously injure (direction of travel), fit the shaft (1).
Page 62
W e a d v i s e h a v i n g t h e t i g h t e n i n g NOTE #x25C6; Only use aprilia Genuine Spare Remove the cover (1). torques, the wheel truing and balancing #x25C6;.
Page 63
#x2013; From above, on the rear part, for both pads #x2013; Front brake pads (1); Inspect the brake pads before each ride. (C). #x2013; rear brake pads (2). WARNING Contact an aprilia Authorized Dealer for the replacement. use and maintenance SR 50.
Page 64
Check the conditions of the rim and brake fluid. have it changed if it is damaged. If it occurs, please contact an aprilia Authorized Dealer for servicing. use and maintenance SR 50.
Page 65
#x25C6; Slide out caliper (2) from the disk REMOVING THE EXHAUST REMOVING THE EXHAUST carefully and remove it. MUFFLER MUFFLER IE 50 IE 361 C 364 Read page 56 (MAINTENANCE). Read page 56 (MAINTENANCE).
CAUTION #x25C6; #x25C6; Unscrew and remove the screw (8). Loosen and remove the two stud bolts After reassembly, pull the brake lever (8).
Page 66
0.079 – 0118 in (2 – 3 mm) and decelerating a few times to make sure that it operates correctly and to check if the idling speed is constant. NOTE If necessary, contact an aprilia Authorized Dealer. ADJUSTING THE THROTTLE CONTROL Read page 56 (MAINTENANCE).
Page 67
#x25C6; The gap must be 0.024-0.028 in (0.6-0.7 C 364 m m ) ; 0. 0 3 5 i n ( 0. 9 m m ) i f necessary, adjust it, carefully bending 0.024-0.028 in (0.6-0.7 mm) the earth electrode. 0.035 in (0.9 mm) #x25C6;.
Page 68
BATTERY Charge or use the battery in a well- check battery charge at regular intervals ventilated place. Do not inhale the (monthly). Read page 56 (MAINTENANCE). gasses produced by the battery under #x25C6; Recharge the battery fully at a normal charging.
Page 69
INSTALLING THE BATTERY CAUTION Read page 68 (BATTERY). After topping up, put back the element caps in the correct position. #x25C6; Remove the tool kit-battery compartment c o v e r. s e e p a g e 3 8 ( B A T T E R Y #x25C6;.
Page 70
ARRANGEMENT OF THE FUSES IE 50 NOTE When you use one of the spare this case, contact an aprilia Authorized 10A fuse (1) – From ignition switch to: fuses, remember to add a new spare fuse Dealer. #x2013; Warning horn into the proper seat.
Page 71
32.81 ft (10 m) VERTICAL ADJUSTMENT OF THE BULBS CHANGING THE HEADLIGHT HEADLIGHT BEAM BULBS (low/high beam) Read page 56 (MAINTENANCE). NOTE Read page 71 (BULBS). According to the standards in force WARNING in the country where the vehicle is used, there The headlight fits: R i s k o f f i r e .
Page 72
#x25C6; CHANGING THE FRONT TURN Remove the complete turn indicator unit CAUTION INDICATOR BULBS (4). #x25C6; Remove the clear screen. Remove the bulb first, then disconnect Read page 71 (BULBS). #x25C6; Press the bulb (5) slightly and rotate it the wiring by raising the locking tab. To change the bulbs: counter-clockwise.
Page 73
Upon reassembly: NOTE CHANGING THE REAR TURN While removing the screen, pay INDICATOR BULBS attention to avoid damaging the clutch dog. NOTE Make sure that the cover (2) locates correctly into its seat on refitting. #x25C6; Read page 71 (BULBS). Remove the shield (2).
Page 74
NOTE NOTE If the bulb holder (4) comes off, CHANGING THE TAIL LIGHT / While removing the screen, pay refit it into its seat so that the slotted STOP BULBS attention to avoid damaging the clutch dog. opening of the holder matches the hole for #x25C6;.
Page 75
TRANSPORT Do not inhale fuel vapors. WARNING Do not smoke or use naked flames. Before transporting the vehicle, it is necessary to completely empty the fuel DO NOT RELEASE FUEL INTO THE tank and the carburetor (on carburetor ENVIRONMENT. versions), see below (DRAINING THE #x25C6;.
Page 76
CLEANING Clean the vehicle frequently if it is used in with a soft car body sponge soaked particular areas or conditions, such as: with abundant water and shampoo (2 – 4% parts of shampoo). #x25C6; Pollution (urban and industrial areas) Then rinse with plenty of water and dry #x25C6;.
Page 77
#x25C6; By means of a suitable support, position PROLONGED PERIODS OF AFTER STORAGE the vehicle so that both tires are raised INACTIVITY #x25C6; Remove the cover and clean the vehicle, from the ground. When the vehicle is to remain unused for see page 76 (CLEANING).
Page 78
Model C364M C 364 Model C361M IE 361 Model Aprilia engine ditech IE 50 Number of cylinders horizontal single-cylinder Total displacement 3 cu. in (49.38 cu. cm) Bore / stroke 1.57 in / 1.55 in (40 mm / 39.3 mm)
Page 79
Coolant 2.18 pt (1.2 ) (50% antifreeze with ethylene glycol + 50% water) Capacities Seats no. 1 (2 in the countries where passenger is allowed) Max. carrying load (rider + luggage) 231 lb (105 kg) Max. carrying load (rider + passenger + luggage) 397 lb (180 Kg) (in the countries where passenger is allowed) Transmission Converter.
Page 80
Tires STANDARD INFLATION PRESSURE Front 180 kPa (1.8 bar) Rear 200 kPa (2.0 bar) INFLATION PRESSURE WITH PASSENGER (in the countries where this is allowed) Front 180 kPa (1.8 bar) Rear 220 kPa (2.2 bar) Ignition Type C.D.I. control unit C 364 Type T.D.I.
Page 81
LUBRICANT CHART (Recommended) transmission fluid. GEAR SYNTH, SAE 75W – 90 As an alternative to recommended fluids, top brand oils meeting or exceeding A.P.I. GL-4 specifications can be used. (Recommended) mixer oil: 2 CITY 2T.
As an alternative to recommended fluids, top brand oils meeting or exceeding A.P.I. SJ specifications can be used.
Page 82
WIRING DIAGRAM – SR 50 DITECH IE 50 PASSING DOWN LOCK 9 10 12 13 14 16 17 21 22 23 24 25 26 27 28 29 30 31 32 33 34 35 36 37 38 39 40 S. PRESS. + S – Bi/Vi Bi/Vi.
Page 83
WIRING DIAGRAM KEY – SR 50 DITECH IE 50 1) Multiple connectors 33) Throttle sensor CABLE COLOUR 2) – 34) Serial connector (diag.) Ar Orange 3) Oil level switch 35) Pressure sensor (or integrated in the Az Light blue 4) Fuel level sensor control unit) B Blue 5) Instrument panel (matrix)
Page 84
SCOOTER WIRING DIAGRAM – SR 50 PUREJET IE 361 PASSING DOWN LOCK 9 10 12 13 14 16 17 21 22 23 24 25 26 27 28 29 30 31 32 33 34 35 36 37 38 39 40 + S – Bi/Vi Bi/R Bi/G.
Page 85
WIRING DIAGRAM KEY – SR 50 PUREJET IE 361 1) Multiple connectors 32) Spark plug CABLE COLOUR 2) Low-high beam relay 33) Throttle sensor Ar Orange 3) Oil level switch 34) Serial connector (diag.) Az Light blue 4) Fuel level sensor 35) Oil pump B Blue 5) Instrument panel (matrix)
Page 86
SCOOTER WIRING DIAGRAM – SR 50 IE 50 MODE LOCK 1 2 3 4 1 2 3 4 5 6 7 8 V Bi R 1 2 3 4 5 6 use and maintenance SR 50.
Page 87
SCOOTER WIRING DIAGRAM KEY – SR 50 IE 50 1) Multiple connectors 34) Serial connector (diag.) CABLE COLOUR 2) Speed sensor 35) – Ar Orange 3) Fuel level sensor 36) – Az Light blue 4) Instrument panel (easy) 37) – B Blue 5) Head temperature sensor 6) Oil level switch.
Page 88
When you demand aprilia Original Parts, you are purchasing products that have been developed and tested as early as the vehicle design stage. aprilia Original Parts systematically undergo strict quality control procedures to ensure total reliability and long service life.
Page 89
SR 50 SR 50 8202397 8202439.
Page 90
Les pi#xE8;ces num#xE9;rot#xE9;es repr#xE9;sent#xE9;es dans aprilia a r#xE9;dig#xE9; ce manuel pour fournir #xE0; les figures sont rep#xE9;rables sur le texte par l’utilisateur des informations pr#xE9;cises et un chiffre entre parenth#xE8;ses ou par un actuelles.
Page 91
AVERTISSEMENTS DE SECURITE C O N SI G N E S G E N E R A L E S D E SECURITE MONOXYDE DE CARBONE DANGER DANGER DANGER COMPOSANTS A TEMPERATURE ATTENTION ELEVEE DANGER DANGER HUILE MOTEUR USAGEE DANGER XWLOLVDWLRQ HW HQWUHWLHQ 65 .
Page 92
LIQUIDE DE REFROIDISSEMENT GAZ HYDROGENE ET ELECTROLYTE DE LA BATTERIE DANGER DANGER LIQUIDE DES FREINS ATTENTION XWLOLVDWLRQ HW HQWUHWLHQ 65 .
Page 93
#xE0; la s#xE9;curit#xE9; sur la circulation des autoroutes) des zones tout-terrain. Le non-respect de m#xE9;lange #x201C;pauvre#x201D; et d#x2019;autres syst#xE8;mes – NHTSA ainsi qu’en pr#xE9;venir aprilia. Si cet ces consignes peut compromettre la afin de r#xE9;duire la production de monoxyde stabilit#xE9; du v#xE9;hicule et entra#xEE;ner des organisme (NHTSA) re#xE7;oit pareille plainte, il.
Page 94
INTERVENTIONS NON- ATTENTION CONFORMES PROBLEMES QUI PEUVENT AVOIR DES RETOMBEES SUR LES EMISSIONS DU VEHICULE NUMERO D’IDENTIFICATION DU VEHICULE (V.I.N.) (NUMERO DU CHASSIS) aprilia XWLOLVDWLRQ HW HQWUHWLHQ 65 .
Page 95
MOIS / ANNEE MANUFACTURED BY / FABRIQUE PAR. APRILIA S.P.A. VIN / NIV: DATE: TYPE: LSM / MVL GVWR / PNBV 288 KG -VFC- COLD INFL. PRESS. GAWR DIMENSION PRESS. DE GONFL. A FROID PNBE TIRE / PNEU RIM / JANTE.
Page 96
POSITION DES ETIQUETTES SIGNALETIQUES AUTOCOLLANTES XWLOLVDWLRQ HW HQWUHWLHQ 65 .
Page 97
SCHEMA DES ETIQUETTES AUTOCOLLANTES MANUFACTURED BY / FABRIQUE PAR. APRILIA S.P.A. VIN / NIV: DATE: TYPE: LSM /MVL GVWR / PNBV 288 KG -VFC- COLD INFL. PRESS. GAWR DIMENSION PRESS. DE GONFL. A FROID PNBE TIRE / PNEU RIM / JANTE.
Page 98
ATTENTION! STARTING PROCEDURE Never install accessories or replacement parts not approved by Aprilia as original equipment. This can Set on brakes and push START button. degrade the handling and safety of your motorcycle, See owner’s manual. and can cause an upset with subsequent accident and serious injury or even death.
Page 99
– ATTESTATION DE RESPONSABILITES DU GARANTIE SUR LE SYSTEME DE PROPRIETAIRE AU SUJET DE LA CONTROLE DES EMISSIONS GARANTIE a p r i l i a aprilia aprilia aprilia ETENDUE DE LA GARANTIE DU CONSTRUCTEUR POUR LE SYSTEME DES EMISSIONS.
Page 100
GARANTIE A COUVERTURE LIMITEE DE aprilia s.p.a POUR SYSTEMES DE CONTROLE DES EMISSIONS aprilia aprilia aprilia aprilia aprilia aprilia aprilia aprilia XWLOLVDWLRQ HW HQWUHWLHQ 65 .
Page 101
Le COMMERCIALISATION OU APTITUDE propri#xE9;taire est tenu #xE0; l’ex#xE9;cution de A. La responsabilit#xE9; de aprilia dans le A UN BUT PARTICULIER, SE BORNE toutes les actions de maintenance cadre de cette Garantie sur le Syst#xE8;me EXPRESSEMENT AUX CONDITIONS n#xE9;cessaires.

- Aprilia Tuono Factory 1000 (2004 – 2010) review – Naked – Motorcycles…
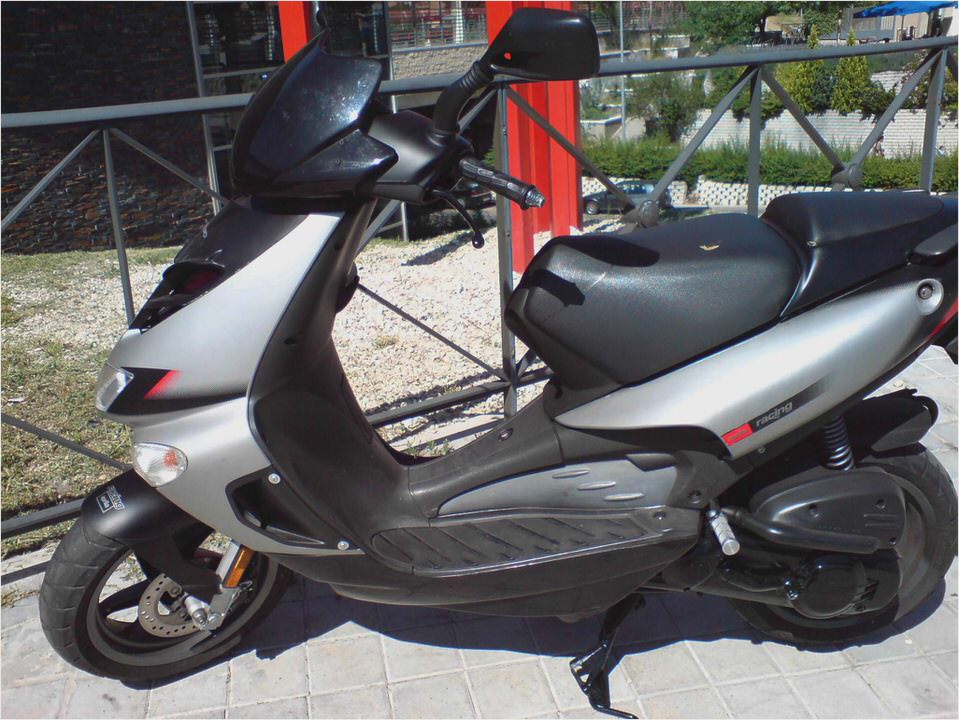
- Aprilia RS 50 Overview and 50cc Sounds Good BigbikeMotorCycles.com
- Piaggio Beverly 500 VS Aprilia Scarabeo 500 Scooters Mopeds
- MAX BIAGGI HELPS APRILIA UNVEIL NEW RSV4 IN COLOGNE Motorbike News
- 2011-Aprilia-Dorsoduro-750-1024×741 All About MotoSport
