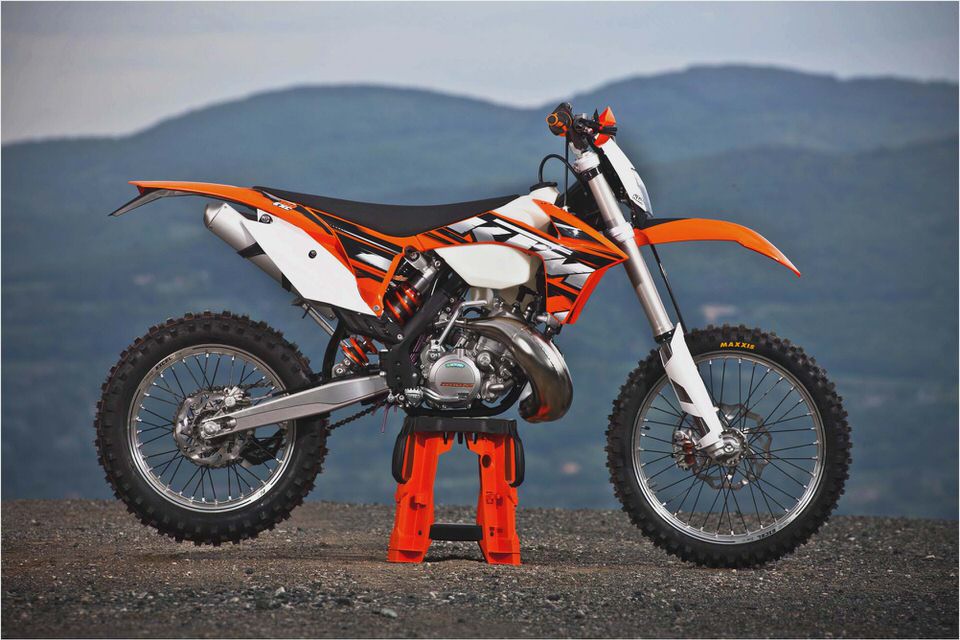
KTM Suspension Lowering Kit
5 Flares Twitter 0 Facebook 5 Google+ 0 LinkedIn 0 5 Flares –
Lower the back and front of your KTM exc or xc-w suspension by 32mm
without any internal shock or fork modifications and without changing springs.
This kit Lowers the bike without changing any of your suspension settings or springs, makes no permanent modifications to the bike, easy installation and removal, easy to return bike to standard height for sale/upgrade.
A Short Overview Of The Kit
There are more videos at the bottom of this page showing installation etc…
With the extremely high seat heights of KTM bikes especially late models, there are times when an average height rider could do with the bike being a little lower, even some fairly tall riders have a short inseam.
We have developed a suspension lowering system that is easy to install and remove, it lowers the bike by 32mm front and back, and it really does work very well.
We know that bike lowering is a subject with lots of pluses – minuses etc. but there is also a lot of grey, there is some common sense to be applied and some potential handling issues We would like to address.
If you lower one end you need to lower the other the same amount, failure to do this will upset the bikes geometry.
Why you shouldn’t just back off shock preload to lower the back.
Lowering the spring preload will lower the rear, but its the extension of the shock back to its original length that causes the problems. one: if you jump the bike and the shock extends, when the bike lands there is no stored energy in the spring and the shock shaft will be moving very fast by the time the spring and damping can slow it down, this will make the shock blast through the stroke and get into the tapered needle damping at the end of the stroke. It would feel very harsh.
Two:Under brakes the shock will extend too far, tightening up the steering and weighting the front forks, this could knife the front if cornering and will make the fork feel very harsh due to the weight transferring through the fork.
The answer to all this is install internal spacers in the shock to limit the travel the shock extends. Then set sag as normal.
Install shorter springs in the fork and install spacers to limit extension.
Doing this will work very well and is the way that suspension companies would lower the bike.
The downside to this is threefold.
It can be very expensive especially if you opt for a re valve at the same time, which you may not need.
If you sell the bike you will probably need to put it back to std height which will need a suspension shop again.
You have to commit to the mod, you cant just try the lowering and see if it works for you.
The answer is: The Terra-x lowering kit
Lowering a bike using this kit works very well, it is safe, it will not damage your bike in any way and can be returned to totally standard at any time.
There are a few options how you set this up which we will explain as we go along.
The basics of this kit are:
Installation of an external shock seal head spacer, this works the same way as internal spacers but does not require shock disassembly, this is a two part aluminium spacer, it locks into the original seal head circlip groove pushes the seal head into the shock and then locks the circlip in to the shock body. There are no spaces between the two halves of the spacer and it absolutely cannot come back out until you want to remove it.
There is no need to release nitrogen pressure in the shock ( see Note below ) we supply the tool setup with the kit to allow easy install and removal of the spacer.
Re-use your original spring and set to the same preload as it was set to when removed.
Installation of a steering stem extender and spacer collar under top triple clamp, this moves the top triple clamp up 22mm. slide the forks up and another 10mm throught the top clamps, this will give 32mm same as the rear. This can be a permanent or temporary way to lower the front please read the front options listed below.
This will move the handlebars up 22mm also, however most riders wont notice this and may find it a benefit while standing, the other front option does not require this mod to the top clamp, so if the bar raise is an issue you should go that way instead.
Q: Will moving the forks up so high cause the front wheel to hit the guard on bottoming ?
Not necessarily, we have found that most of the time the wheel will not bottom on the guard, even raised up the 32mm however it may foul on the exhaust on a four stroke, the best way to check is to remove the springs and install the forks and wheel with the triple clamp mod, and compress until the forks bottom, put a strap around to hold it there while you check for clearance.
If spacers are required they are supplied in the kit, they need to be installed to the hydraulic stop on the damper rod.
Installation is easy, no fork oil needs to be drained.
These spacers are 22mm the same as the triple clamp modification.
The benefits of doing the front this way are: No change of springs and no internal fork mods that require draining oil etc. keep your fork as it is, if you like your front suspension the way it is this will not change it at all on the other hand if you change the fork via the shorter spring method even the same rate spring will probably require some low speed valving adjustment.
Its super quick can be reversed almost immediately and works.
Front fork option
This will require the purchase of shorter fork springs.
If this is the way you wish to go after trying the bike lowered via the above way, and don’t like the slightly higher bars or any other reason, we supply in the kit, all the internal spacers and preload spacers to do this mod.
We also supply all the information on how to do this yourself with video and text, how to pick springs, set installed preload and re-assemble with new oil to the correct height.
Kit contents:
Shock spacer (ring 2 piece)
Steering stem extender
Steering top triple clamp spacer
Internal fork hydraulic lock spacers
Internal fork travel reducing spacers
Fork preload spacers (assorted)
All videos showing each step of the installation and removal of each component in any option.
Note on Nitrogen pressure
By installing the shock spacer ring, the nitrogen in the shock reservoir will increase slightly. There are a couple of options and some information I would like to list here.
Most suspension tuners we have talked to think that this will have no effect on how the shock performs and we agree with them after testing this extensively, however others may be of the opinion that this will make the shock harsh, there is always differing opinions on any subject.
Its important to know the purpose of the nitrogen so you can decide for yourself if you want to explore any of the options at the end of this section:
The nitrogen keeps pressure on the oil to prevent cavitation in the oil, the piston in the nitrogen reservoir only moves to accommodate the oil displaced in the shock by the shock shaft when it compresses into the shock body.
The spacer ring installation will displace some oil into the nitrogen side, compressing the nitrogen slightly, although if you take the following numbers into account it is not a huge effect.
Nitrogen pressure std according to ktm is 10 bar or 150 psi
the oil displacement of the shock spacer would increase this by around 10 psi
Race tech pressurize to 175 psi
Other suspension tuners we have talked to pressurize to 200 psi or more.
I have a video showing compressing the shock shaft with no spring on the shock once with the spacer ring installed and one with it not, there is no discernible difference in the amount of force required to compress.
I run my own bike with this kit installed and have been for three or four months, the suspension works as good as before the kit was installed. I have revalved my forks but I run the shock standard, with a 8.0 straight rate spring and 0.49′s in the front, there is no need to run this kit with light springs, you use whatever you are using now.
Q: If I want to check the nitrogen pressure after installation etc..
It is also possible to install the spacer then release the nitrogen and recharge, but we don’t see any benefit in doing this, however it is a cheap option should you feel you need it.
It is also possible to remove the oil the spacer displaced without bleeding the shock, however we have been told by a reputable suspension tuner that he see’s shocks that are on new bikes overfilled with oil and the piston is further down than is specified.
We take from that that its not that critical as long as there is space for the movement needed for the shock shaft, also if you do this, then remove the spacer later, its possible there may not then be enough oil in shock.
Summary
The benefits of a lowered bike far outweigh the slight loss of suspension travel, I never have issues riding my lowered bike I don’t get hung up in ruts, case out on logs or bottom on jumps (and I am not a lightweight rider) in fact I have never had a situation where I have said oh yeah that’s because the bikes lowered.
Try it for yourself and if you don’t like it just put it back to normal, but we don’t think you will be doing that, at least not until you sell your bike.
A few other things to consider if you have looked at other lowering options
Installing this kit requires no swingarm and/or shock grinding or machining,
The rear wheel will not bottom on the guard,
There is no guesswork you will get a guaranteed 32mm lower seat height.
Easy to remove kit and return bike to standard.
This Kit Will Fit The Following Models:
- KTM 625 SMC Vs. Suzuki DR-Z400SM – Street-Legal Supermoto Comparo – Motorcyclist…
- Orange Hooligan – Revisiting the KTM Duke 690 III Bikes Republic
- KTM 560 SMR street legal plated in NY
- The Dirt Bike Guy: 2013 KTM 250 SX-F TwoWheelMania
- 2009 KTM 450 & 505 SX Review

